Friday, January 29, 2010

Keepin' it Real

I just wrote a note to friend who asked me about how I was doing with all these chitlins. She was struggling with a new baby herself and wanted to know what I had done when my hubby was out of town and how I kept it together since I was so good with organizing and schedules. Ha! Not so right now! I think that since I don't actually write in a journal that I should share the things I wrote with her.

I keep my posts as a record of what is happening with my family and this is a topic that has consumed my thoughts and emotions for almost 2 years. I haven't touched on it until recently on the blog, but I want to place these things down here so that I can see how far I've come (hopefully that's how I'll feel in a year or so!) and have them to share with my girls when they become moms.

I want to be honest and help my girls to not have unreal expectations in their heads that they measure themselves against. So here we go... (names have been changed - since not everyone wants to be in my blog!)

I am usually very organized, but not since Lauren. I struggle with almost everything - cooking, cleaning, spending time with each kid. This is just not the time in my life for being on top of things. And Megan is having the same weight issues Lauren had so I'm strapped to a baby or a double breast pump much of the day. It's pretty impossible to go out and go shopping, or leave the house at all for much time.

I have had baby blues after each kiddo, but with Megan I had full-on depression - which makes it harder to "see the light" and have a good attitude. I went to see a counselor once and would like to start going again in the coming months. The lady I saw was wacky and I won't see her again but I did leave with two ideas that helped me.

1. This is how it is right now.
2. My kids don't know any differently.

One thing that she told me was that I have never seen a big family work so my expectations are all wrong. I have one sister - and we are almost 4 years apart so I never saw all that goes on in a house full of young kids. We had so much time with our mom, she threw birthday parties each year, we had fun outings, we had our own rooms and not many responsibilities and lots of toys and room to play. And since there was so much time between us I NEVER had to help much with my little sister. But that isn't how it goes when you have a house full of little ones.

So I don't stress that I can't go out with the girls, accept dinner invites, exercise much, clean and have yummy meals as much as I would like. I try not to worry when I voice these frustrations and people just say "Oh sure you can! You just need to 'blah, blah, blah' (insert some helpful suggestion to fix my life) ". This is just the season for "getting by" at our home. And I'm OK with that. Everyone is different and has different struggles, and babies are just something that I can't juggle with a lot of other things.

Rick has 3 weeks vacation each year and he used almost every minute of it to stay home when we had the baby and to stay and help me in the mornings for a couple of hours. He has even made up time after the kids are in bed, working on our slow home internet connection or driving BACK to work for a few more hours. He saw that I was drowning and helped as much as he could.

And my kids don't know that they're missing out on things that I want for them - they don't think it's too terrible to be all 3 in the same room, they don't know that I want them to be able to go to the park, and have people over, and do sports and go on family hikes and whatever. They don't know that I hate that they have nowhere to play. It's just not possible right now, but they don't know what I have in my head that they aren't getting. This is normal life for them right now.

I know that things will get better as the babies get bigger. I can't wait for it! But until then I just try not to compare myself with others, or what I think life "should" be right now. Because there is only what it "is". And I am trying to make the best of that.

I feel like I am doing well. I think the biggest issue is me worrying about what other people think. That I'm lazy or not able to take care of my family like I should - that I'm slacking in my calling or not doing my best. But *I* am happy and content with how things are. I've agreed with myself to be this way just for right now. It's not how I would prefer things to be, but we're functioning and pretty happy. :) I know that as things ease up at home that I'll be able to be more clean, to do more fun things with my kids (and without them), to cook more, etc. But for me this just isn't the time and season for that. I think that what keeps me sane - knowing that my life will be back the way that I would like soon. That I will get to be the person I want to be.

You should call Sarah when your hubby is out of town. There are a lot of people who will help. And it's not bad or weak to want to have some help. I used to dread June calling me to tell me that Sarah wanted to set up dinners or some help for my family. I thought she was judging me inadequate and selfish for asking for any help. But I found out that she OFTEN has people over to watch her kids so she can go to the temple, or shopping, and she has people even watch them overnight so she can be with her husband. Many people have family who could do that, but I don't and I was amazed at all the help she was getting. It kind of made it OK for me to ask for help too.

When Rick was in Alabama and I was sick with the flu I just about lost it. Both babies were up all night - tag-teaming it seemed - and at one point I thought how I wished that I could just drop my kids off at the fire station so that someone could take care of them better than I was - and for that one second I was dead serious. I called Rick the next day and had him call Sarah because I knew I couldn't do another night like that.

She had a hard time finding people to come over b/c I had what I am pretty sure was the swine flu and no one wanted to get sick. So she had my Home Teachers come by and give me a blessing and she herself came over to help me get the kids into bed while Betty cleaned my bathroom and Alice made them dinner. Connie came over one morning and Ruth the next. It was amazing. An extra pair of hands is such a God-send sometimes. So I strongly encourage you to have people come by. Have dinners brought in, have someone come by in the evening/morning whenever you feel like you need an extra adult to wrangle the kids. It really isn't a big deal to them - not an inconvenience. They enjoy spending time with you and your kids and it's like a huge weight is lifted off of you. Really, it's not a burden and the difference can be life-changing for you.

I think in the past that's how women got things done - no one lived far from family and everyone helped each other. We are more isolated now and I think so many suffer because of it. I was talking with Wanda and she said she's seen women of our grandparents' generation talk of how hard it was and feel very bitter about their lives. So many were depressed. We really do need each other. It is so hard to be a good mom - especially when you have high expectations for yourself.

This may be WAY more than you wanted or expected - sorry if you didn't need all that! :) You have been through so much lately, and it is soooo hard to be a good mom. You could do it by yourself, but you shouldn't. It will be ok! Tell me how I can help! :)

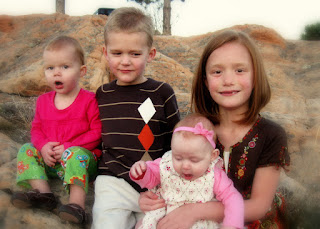
And... that was it. It's such a journey to be OK with my "sub-par" life currently. Really, if I didn't know that this was not how my life would be forever I think I would lose it. It's just for a short time - I can do it. It's exactly what I tell myself in labor. And truly it's not like this for everyone. That's why so many people just tell me to "Just Do It". "Sure you can exercise." "Just start a schedule." But they aren't me and they don't have my limitations or my skill set, physically or emotionally. They have no idea what it is to be Erika in this part of my life right now. I hope my girls never have to go through this, but if they do I hope that I can show them that THEY CAN. Megan, Lauren, Nathan, Ashlyn - I love you!

"Love One Another"

Here is one of the very first crafts I ever attempted! I found the inspiration and directions here and crafted away! I added a clear top coat to protect it (and my furniture!) from paint transfer and minimize dings to the finish.

This is still my favorite decoration for Valentine's Day and I keep it up as long as I can because I love the sentiment!

Tuesday, January 26, 2010

For Shelley

So here is the concoction that makes the lovely Thieves Oil...

1 Tbs Clove Oil
1 Tbs Lemon Oil
2 1/2 tsp Cinnamon Oil
2 tsp Rosemary Oil
2 tsp Eucalyptus Oil

I keep this in a dark glass bottle with an eyedropper lid that I purchased for less than $2 at the Vitamin Cottage (where I also bought the oils and some Dr. Bonner natural liquid soap). Don't keep this in a clear container or the oils will lose effectiveness.

This recipe was originally written to be mixed with 1 cup Jojoba oil or another carrier oil (olive, almond, etc) and used topically (dabbed on your skin) to keep you from getting sick. I chose to keep a mixture of just the Essential Oils to use in my cleaning products. If I choose to use it topically I'll dilute as I use it - 1 drop Thieves to 4 drops of a carrier oil.

If you dilute the Essential Oils with a carrier oil you can dab it on your chest, feet, wherever so they are absorbed into your skin. NEVER put the undiluted oils on your skin - they are too concentrated.

You can also put a drop or two of the oils (or 2-3 drops of the oils mixed with Jojoba) in a pot of simmering water on the stove to sanitize the air.

Monday, January 25, 2010

And for my next trick...

...fixing a T shirt with random blue stains! Where do these things come from? I'll update when I finish. Here is my inspiration! I'm chopping up a sacrifice Tee to cover the stains on mine. Is it bad that I'm sacrificing my daughter's Tee for the greater good? Hope for the best!

In other news... Megan is doing better with her weight now - up to 13lb 13.2oz as of yesterday (9%). She seems a little out of sorts and fussy but they weren't able to find anything the matter so pray she starts to perk up so Mommy and Daddy don't lose it! ;)

And we are having some changes at TheOnesInColorado - hopefully changes for the best! I'll tell you when I can - so no begging! :) We are having a time of reflection and prayer and waiting on some divine guidance...

Also - this weekend we started "decrapifying" downstairs (thanks for all your cute comments on Facebook about it!) but only got so far before Sick Mommy had to retire for the day. I'm glad that I was sickest on the weekend though - not much is harder than being a sick mom alone during the week. I am grateful we were able to have 2 adults to share the burden and hoping I'll be doing better as Monday looms closer!

Sunday, January 24, 2010

The best baby gifts!

Let me introduce you to my favorite baby gifts!

The set includes a Burpie, Bummie, and a Diaper Case - and you can make all of them with just a yard of cutesy fabric and some terry cloth!
The Burpies are nice-sized burp cloths and the Bummie is a changing pad. I found them here. Very easy! Just cut out a 10"x18" rectangle of fabric and the same size rectangle of terry for each Burpie you want. Place them right sides together and sew the perimeter - making sure to leave a gap to turn the Burpie right-side out. Tuck in the seams of your gap so they match the sewed sections and then top stitch all the way around.

 
Here's a tip: Did you know you can have different colored thread in your bobbin than what you're using to sew with for your top thread on the machine? This way you can disguise your stitches! For example, you can see above that the thread is brown on the side of the Burpie that has the patterned fabric, but I used white thread in my bobbin so you can't see the stitches on the terry side! Nifty, eh? Of course I didn't think of that on my own - but I use it all the time now! I found out about it here (also where I was introduced to the hem guage - where you'll find another great burp cloth tutorial! I used it to make this set...
OK, back to the Bummies...
Same idea for the Bummie as for the Burpie - but the size is 16"x22" and you sew a piece of ribbon into one of the short sides so you can tie it up. To do this I fold the ribbon in half, place the folded end of the ribbon in between your 2 fabrics 1/4 of the way down a short side. This way when you fold the Bummie in half the long way and then roll it up, the ribbon tie will end up being in the center of your roll.

And finally for the diaper case - I use the pattern and tutorial here. I have a special place in my heart for diaper cases - I just hate how dipes always get smashed up and yucky in the bottom of the diaper bag! And I should add that I make my diaper cases bigger than her pattern yields so I can have more diapers in there!

And be grateful that you are using the updated pattern! The first one I made was all wonky and the second one (Thank Heaven!) my mother-in-law was here for and helped me figure out how to fix. For my third they fixed the pattern and I had no problem whatsoever! :)
So there you are! I will be adding more links to baby gift tutorials soon!

Lest you think I have turned into a craft blog...

I think since I'm not getting graded here I can plagerize...

Read it before you go on!

This pretty much sums it up! :) Kathryn has such a way with words - I feel so lost for words most of the time that I can't express how I feel in a way that comes across in a way that is a true reflection of what I want to say.

And how silly of me that I never thought to stop and send a prayer "heavenward asking for wisdom for a mother of four". As much as I know it intellectually it is never my first thought - "Oh, I should be praying for help with this." My prayers lately (though not this week - I've been working on it!) are often in desperation, at a time of perceived crisis. Silly me, why not pray before? Each day? For fortitude and wisdom? Maybe I need to have friends to take long walks with - and take them! Or a husband who talks! ;)

I love how Kathryn puts it and hope that I can reach the same peace she seems to have.

Saturday, January 23, 2010

The craft half of the laundry room in all it's glory!


Here's another room almost all the way done - the basement is coming together! Yay us!

Friday, January 22, 2010

Tired of the Dollar Tree?

Too bad - cuz I'm not quite finished yet!

I needed a larger container to hold my scrapbooking scissors (and the normal ones too) so off to the store I went! I first found a tin at Target for $2.50 in the Dollar Spot that I loved but I felt like it was smidge too big and I had been hoping for something for a dollar. Hmmm. I'm so glad I listened to my gut and decided against it because look what I found at the Dollar Tree!
Same idea, perfect size! And I need to ask - why not leave a good thing alone? Why did they add the ridiculously silly pictures on the side? Oh, well - they are just testing my imagination to see if I can find the potential! This is supposed to be a planter and you should be able to find one for yourself when your store gets it's spring supplies in. One of the stores near me had it and one did not so I think they are just coming out.

Anyhoo....

I pictured it covered with burlap - not quite to the top or to the bottom, just a strip around the middle with tin showing above and below. Then I had thought to add some cute black ribbon around all the way around in the middle of the burlap.

But the tin had other plans! You shall see!
First I cut a strip of burlap wider than the planter's height and longer than it's circumference and hot glued it to the planter.
Then I trimmed it. And I ended up trimming too much! The silly blue butterfly wing went up higher than I thought and the tip of blue showed. :( So I ended up just taking some plain black ribbon and gluing it around the top to hide my mistake. It actually looked very cute with just the burlap trimmed flush with the edges on the top and bottom. But I like this better so I'm glad for a providential scissor mishap!

This one was a quickie and there is much room for embellishment or you can keep it simple! I may add to mine - maybe a label or burlap/scrapbook flower. I'm not sure yet, but I love it for now!

Thursday, January 21, 2010

Other recipes I plan on trying


This is mostly so I can find these when I'm ready to mix up some cleaners...

Again from the Earth Day on the Net Site:

Toilet Bowl Cleaner
Looking for ecological and effective method to clean your toilet? Look no further. Plus you get a super fun science experiment that young children will adore -- which is great news if you're looking for ways to get them involved in the household cleaning.

1/2cup baking soda
1/2 cup white vinegar

Pour baking soda into your toilet bowl and mix thoroughly with a toilet brush. Scrub inside the rim as well. Allow the baking soda to sit for up to 20 minutes -- the longer it sits, the more stains and odors it removes. Pour in white vinegar and stand back as your toilet foams up like a mini-volcano.
When foaming action stops, scrub thoroughly with toilet brush. Clean outer surfaces and toilet seat with All Purpose Cleaner.
Flush to remove any residue.

Bathroom Mold Remover
The mold that builds up in your bathroom tile grout can quickly become a serious health concern. But you don't need to use the toxic guns to remediate it.
Start first with prevention: Maximum ventilation in the bathroom is key.
If there are no windows to crack or if the mold has already multiplied, then using this all-natural recipe will cure the problem in a jiff:

4 tablespoons 3% hydrogen peroxide
8 tablespoons warm distilled water
Mix peroxide and water together in a small spray bottle. Spray affected areas and wait at least one hour before rinsing.

I also think I'll be adding Thieves Oil to the Mold Remover - do you really think I have to rinse it off? I wonder why it would matter since it's dry by the time the recipe says to rinse.


Floor Cleaner
Most floors can be easily cleaned with one cup of white vinegar mixed into a gallon of water.
Don't worry: Your house won't smell like a salad bar as the vinegar smell dissipates in seconds. You can always add a few drops of Essential Oil, though, if you prefer a fresh mint, citrus or lavender scent.
Again - I'll be adding Thieves oil - or maybe just Lemon - mmm!

For really dirty floors, dissolve 1/4 cup of Borax in a cup of warm water and add to the vinegar mix.
For ceramic and stone tile floor, use the above formula, but rinse well with clear water.
For wood floors, mix one part olive oil with one part white vinegar in a spray bottle. Shake well and mist over your floor. Shine with slightly damp cloth.

Oven Cleaner
from Recipezaar.com
An environmentally friendly, easy, non-chemical way to clean your oven. No over-powering fumes.
1 cup baking soda (or more)
water
2 tablespoons dish detergent

Wednesday, January 20, 2010

The curtains are done!


These are (again) in the craft/laundry room in our basement. I just love them. And the tan fabric is burlap! You can either glue these together or sew them. I chose to sew - and surprisingly the burlap worked well! I was worried since the weave was so loose, but I didn't have any problems (well, not any problems that didn't involve a brain malfunction on my part - it's a rare project that I don't end up using the seam ripper!). I found my inspiration here and still plan on doing something similar in my living room. I haven't had window treatments in that room in the 6 years we've lived here. I was just waiting for something to strike me and now it has! Yay!

Tuesday, January 19, 2010

Made it!


Thieves Oil All-Purpose Cleaner. Mmmm - the kids loved the smell and I loved the clean! I found a recipe online and went to town in the kitchen last night - counters, microwave, cupboards, stove knobs, window sills - the works! I have to say that it did at least as well as 409 has for me - likely better. I think it is safe to say that I will be gifting some of my cleaning supplies and making my own.

If you are interested here is the recipe from Earth Day on the Net:

This is a great All Purpose Cleaner for everything from kitchen countertops to bathroom tubs to unidentifiable carpet stains. Gentle enough for young children to use on their own, yet tough enough to remove stubborn stovetop grease.

Note: While this recipe is 100% natural, Borax can cause eye irritation and, if consumed in large quantities, can be poisonous to humans and animals. Exercise caution when handling Borax and store it safely away from children and pets.

1 teaspoon Borax
1/2 teaspoon washing soda
2 teaspoons white vinegar
1/4 teaspoon dishwashing liquid
2 cups hot water
Optional: 15-20 drops of Essential Oil (EO) of your choice

Mix vinegar, Borax, washing soda and 1 cup of hot water in a 16-ounce spray bottle. Swish around gently until the Borax and washing soda has fully dissolved.
Add remaining hot water, dishwashing liquid and optional essential oil. If you can't find washing soda in the laundry section of your grocery store, substitute with 1 full teaspoon of regular baking soda.


From Erika: I added the Thieves Oil I made as the EO and used Dr. Bonner's soap for the dishwashing liquid. And make sure you are using washing soda and not baking soda. Ask around at your grocery store - sometimes they keep things that aren't purchased often in a back room.

Monday, January 18, 2010

Dollar Store Cork Board


So cute and lovely, no? The original Dollar Tree cork board was nice - it just had a medium oak color frame.

First thing I did was to spray paint. On this frame, unlike most I've painted, the back didn't easily come off. So to keep from painting the cork I slipped pages in between the frame and the cork all around the frame. Here's one piece of paper to show what I mean...
The cork on this board is super thin (what do you expect for a buck!) so I am thinking about buying a roll of cork board and cutting out a rectangle of it to glue to the back side of this frame. But that's for another day!
Now on to the pushpins!
I bought a pack of pushpins (again at the dollar store) and pulled off the pin. It's the dark portion in the pics below. It was held on with a dab of glue and was SUPER easy to remove.

I could have hot glued some fabric around the existing cover (pink in the pictures) but I didn't want to have a sticky mess so I bought a pack of 4 button covers at WalMart - I think they cost $1.22.
I took the back of the button and pounded down the sewable metal loop so I could stick the pin on.
Cut a piece of your desired fabric and place it in the rubbery portion of the button maker.
The directions say to cut the fabric at least 2x the diameter of the button. Don't be afraid to cut it too big - you can trim it later! (And it will look very silly and require some craftiness to salvage your button if you trim too much now - ask me how I know!)

 Then place the button cover on top of the fabric.

Use the pusher and push the cover down into the hole.
Tuck in the fabric (here is where you can trim a little bit of the fabric if you like - but not too much!) and place the button back on the top.
Next use the pusher and push the button together.
And out it comes!
Place glue on the button and the tack on the glue.
  
And you're done!

Sunday, January 17, 2010

Ribbons and the Dollar Tree

First - ribbon storage! I loved these ideas from kmckaydesigns.com. I bought the Crop-a-dile specifically to make the box with the cute acrylic jars. I followed the instructions here. Basically you punch holes in the acrylic and set extra-large eyelets in the holes.

This cute project turned out to be super cute but much more of a pain than I anticipated. First the Crop-a-dile... I found it to be cheapest online at HSN for the punch and hundreds of eyelets and accessories. I was impatient to be started and didn't think I'd use all the extras so I opted to use my 40% off coupon at Hobby Lobby and get just the punch w/o the extras for $30. (It was $36 with shipping at HSN). Little did I know that I would have to wait anyway!
The eyelets pictured are the only ones I saw that were large enough for the ribbon and to go through the acrylic. And they are nowhere in my local stores. So I ended up ordering them online from craftybetty.com. So after all of this I was finally able to get started with my loverly box. I think it turned out well, but the "hairline" cracks in the acrylic mentioned in the directions were huge! Maybe kmckay used a thinner acrylic. But with the ribbon inside you really can't tell.

I chose to Mod Podge some scrapbook paper, trimmed to fit, on the sides of my box. I painted the edges black and then painted on MP with a sponge brush, smoothed out my paper with a plastic pan scraper (pack of 2 for a buck - and they work great on my dishes) and then applied another coat of MP. I think it looks great, and matches the patterns and colors in my craft area. And I used the method discussed on the tute video to paint and dry my knobs for the boxes - such a good idea!

And the post-it note holder - another dollar store creation. You buy the 5x7 acrylic frame, slip a piece of scrapbook paper in where the photo goes, decorate, and stick the post-its on. I didn't glue - just let the post-it pad's sticky strip hold it up. The pen is made to match by rolling a strip of the paper up and pushing it into the ink compartment of a clear pen. Very cute if I do say so myself. I now look forward to jotting down phone messages!
I also made another ribbon storage box with the Crop-a-dile and eyelets. I took a photo box (mine was from JoAnn's but Hobby Lobby also has them - $3.99, use your 40% off coupons) and punched eyelets around the sides. This time no cracking! :)

Here are some other fun things for the craft room from the dollar store:

2 cheap canvas pictures and a brassy plastic mirror... sorry no befores of the mirror. I promise it was less than beautiful.


Then spray paint the mirror frame and paint the edges of the pictures.

Mod Podge on some pictures or paper to match your decor.
These are on the wall between my cupboards in the laundry/craft room.

Friday, January 15, 2010

Thieves Oil and pondering


When Rick was in Alabama this past week I had a kind soul offer to come and help clean my house to tidy it up before he came home. What a life saver! It was very humbling, but her service made such a difference to me. I've felt very needy since having my fourth baby; not in a clingy, whiny girlfriend way but in the way that the Bible speaks of when it says we are all truly beggars. We need to rely on God for all things - even the breath we take. Well, in my life, for many reasons, I have chosen not to rely on others. I may accept help if it is offered but I don't seek it out. For little things yes, but I mean for the big things that mean a lot to you and are essential to your well being. I have been so stubborn. I have been forced to see recently that if you are rigid you will break under pressure. Unfortunately I have had to be broken over and over again and I'm still not sure I'm done learning this lesson. This part of my life seems to be a bit of a refining. It seems like trial after trial at times and I wonder when it will end. Little by little I am seeing that I can live through these things, but I will need to seek out help from others. Yikes. Not an easy thing.
Soooooo, back to the cleaning. She brought some natural cleaning solution called Thieves. It is said to be based on a recipe used by a band of thieves who robbed the homes of the dead and dying during the plague. They would rub themselves with plant extracts and were never sick. Well, whether you believe it or not, the mixture of the 5 essential oils has been proven in laboratory tests to have a 99% kill rate for airborne bacteria when diffused. It is a mixture of lemon, cloves, cinnamon, rosemary and eucalyptus oils. It smells so good! You can dilute it in a carrier oil (olive, almond, jojoba, etc) and dab it on your skin to ward off illness. You can dilute to purify the air and you can add it to cleaners to give them antibacterial/antiseptic properties. So I went to the store and mixed some up! I will be trying out some non-toxic cleaners this next week and hope to find them effective and then clean out all the chemicals I currently use. Now as a couponer I have quite the stockpile, but I will gladly get rid of them to clean up my home. I'm so excited to try it out!

Some me time...

I like to craft to get back in touch with myself. Seriously. I love the process of creating and beautifying. So as part of my lovlifying the laundry/craft area I bought an old, stained office chair from a local thrift store and recovered it. Wanna see?
All right - a tutorial for you!

1. Buy a chair with good "bones" - test out all chairs to make sure that you get the one that will adjust to be the tallest. :) Then disassemble it and unscrew/pop off the fabric and padding.

Cut out a piece of fabric that will cover the seat of your chair with a few inches of overhang. If you chose a patterned fabric and you'd like it centered make sure you adjust the piece to your liking before you cut.

Staple all around the edge on the underside of your seat. I used the cheap gray stapler you see - light-duty. I didn't even take off the old fabric.

Isn't it lovely?

Repeat for the back rest and put the pieces back on!

Et Voila! I am so happy with it!


Dec 25th - the birthday!

He wanted cupcakes with blue frosting - and he got 'em! We also had macaroni and cheese with Little Smokies. :) Lovely Christmas dinner!

Megan - 5 months! It's Christmas! And a milk story, and a bit of poop.


So cute! A week after these pictures were taken we took Megan in for her belated 4 month check up (12/30).
Deja - vu...

"Previously healthy baby has now dropped below the 5th percentile for weight gain... please give her lots of formula."

Height 2 feet 2.58" (88%)
Weight 12lb 5.7 oz (4%)

Thhhppptttt. So of course I didn't. I told God that this was the one thing I could NOT do again. Obviously he knows that I am stronger than I think and need to learn a few things.

This was so hard for me - it is truly my weak spot. The stress of failing to give my baby all that she needed was such a blow. I just cried. I wanted to do all I could - more than what I did with Lauren even, so I went on a mission to get my supply up.

We went downtown to the hospital straight from the appt. to rent a breastpump. (And while we were gone the sewer backed up downstairs - thanks to my visiting sister's help disaster was avoided... But what a mess! And on such a crappy day!) I bought Fenugreek. I proceeded to pump after each feeding, popped 3 pills with each meal and prayed and cried. I fed Megan alone, lying down, in hopes of increasing the face time we were getting. Every 2 hours all day and 3 hours all night. We started rice cereal a week early. Crossed our fingers.

And then she got sick. Ugh. Coughing so hard she was vomiting. She wouldn't sleep. One day she only cat-napped all evening/night and cried the rest of the time. We took her in - double ear infections. Can we not catch a break? Never mind that Lauren has been sick with the same cough/fever and Ashlyn and Nathan are taking turns throwing up every other day. This was one of the most trying times of my life so far. I know, I whine a lot. But it was terrible.

But - when we took her in for the ear infections (1/6) - she'd gained weight! 12 lb 12 oz. Almost an ounce a day. A miracle!

Starting today I've stopped pumping and pilling. We'll see how she does for the next day or so and re-eval to see what we need to do. If I have to pump for months I will (but I hope not - so sore!) but it's good to know that I didn't have to resort to a bottle. Truly, that is my biggest blessing in this. After Lauren, I really need to feel like I can do this for my baby. She's such a trooper!

And during all this my sister came to visit! For her first visit to Colorado she arrived Dec 24th, 2002. Just in time for me to go into labor with Nathan. And on Dec 24th, 2009 she visited for the second time. We did some crafty things and had a nice visit - even if we were all sick and we sent her home with it. (Ooops!) It was so nice to have her!

5 years old!

An alien cake for your enjoyment!
Space/Astronaut party - here we go!

Random image of Birthday Boy's loot that I found on my camera


The Saturday of Nathan's party was also his last basketball game! So the alien waited patiently to be eaten until after the game. :)

Getting his medal and a big hug from coach Joe
The team - go Grizzlies!
Defense, hey, hey, Defense (all lined up with hands stretched up)


Crayon Rolls


I helped out Santa with some crayon rolls for the kids stockings - cute huh? I just used a fat quarter ($1) from Walmart for the smaller ones that hold the mini Crayola Twistable crayons. I thought they'd be good for Sundays. And I made space-themed rolls for all of the kids that came to Nathan's 5th birthday this year. It was a fantastic goodie bag if I do say so myself!

Behold.... the Shed


Thanks to Harbor Freight we have a roofing nailer. And thanks to Glen and RC - I have a super-talented Jack-of-All-Trades to use it and dangle perilously from great heights for the good of mankind - or mostly my cluttered garage and basement.

Dec 5th "Sleep"


Lauren crawled up to the top bunk all by her lonesome... Scary! She closed her eyes and said "sleep" when she was confronted...

Cuz he's awesome

Dec 1, 2009
Cool on so many levels... Squirt gun, Mardi Gras beads, shades, cell, missionary tag...

Megan's Blessing - November 15, 2009

We blessed Megan on Grandma's birthday and were so lucky to have both of Rick's parents, and my besty from the Westy - Kim and her family (Master Curtis, Ravin, Annastasia, and Mason) in town as well. We had a super snow storm that day and everyone around us had canceled church but not us! On the way home I couldn't even get up our cul-de-sac it was too slippery for our bald little tires! It was such a treat to have loved ones in town for our special day with Megan!
Here she is!
L to R: Nathan, Curtis, Mason, Ravin, Kim, Ashlyn, Mom holding Megan, Rick holding Lauren, and Stasia.
Our family with Grandma and Grandpa
The proud parents and beautiful baby!
Related Posts with Thumbnails